Blender, a popular open-source 3D modeling software, has gained recognition for its versatile capabilities in creating stunning visual effects, animations, and intricate 3D designs. But can you use Blender for 3D Printing? Let’s explore the integration of Blender and 3D Printing to understand its feasibility and advantages.
Firstly, let’s understand what Blender is. Blender is a comprehensive 3D creation suite that provides robust features for modeling, sculpting, animating, and rendering. With an intuitive interface and a powerful set of tools, Blender is widely used by professionals and enthusiasts.
Regarding 3D Printing, Blender offers various capabilities that make it a viable option for creating printable models. It provides tools for importing and modifying existing 3D models, positioning and scaling them, and adding necessary support structures. Blender also allows users to optimize 3D models by identifying and resolving mesh issues and adjusting print settings and parameters.
Compatibility is another crucial factor in 3D Printing. Blender supports various file formats commonly used in 3D Printing, including STL, OBJ, and AMF. Blender integrates seamlessly with popular 3D printing software, enabling a smooth transition from design to physical object.
To prepare a 3D model for 3D Printing in Blender, you must go through several steps. This involves importing the model, ensuring proper positioning and scaling, adding support structures if required, and optimizing the model for 3D Printing by resolving any mesh issues.
Once the model is prepared, it needs to be exported in the appropriate file format, considering the requirements of your 3D Printer. Blender offers export settings and considerations to ensure compatibility and smooth Printing.
After exporting the model, the next step involves preparing the 3D Printer, calibrating it, and transferring the model to the Printer’s software for Printing. The printing process begins, and once completed, post-processing may be required, such as removing support structures and refining the printed model.
While using Blender for 3D Printing offers numerous advantages, one must be aware of common issues that may arise during the process. From dealing with print failures to fixing errors in the printed model, troubleshooting is a crucial aspect of successful 3D Printing.
Key takeaways:
- Blender can be used for 3D Printing: Blender has specific features and capabilities that make it suitable for 3D Printing, allowing users to prepare, optimize, export, and print 3D models directly from the software.
- Compatibility with 3D printing software and file formats: Blender is compatible with various 3D printing software and can export models in commonly used file formats, ensuring smooth integration into the 3D printing workflow.
- Troubleshooting 3D printing issues with Blender: Blender provides tools and resources to troubleshoot common issues in 3D Printing, such as print failures and errors in the printed model, helping users achieve successful and high-quality prints.
What is Blender?

Photo Credits: Futureproof3D.Com by Jeremy Hall
Blender, a versatile software, opens up a world of possibilities for 3D printing enthusiasts. In this section, we’ll dive into what Blender is all about. From its powerful features to its seamless workflow, we’ll explore how Blender empowers users to bring their creative visions to life. So, if you’re curious about the potential of 3D Printing with Blender, stick around and discover the incredible capabilities of this dynamic software. Let’s get started and unleash your imagination with Blender!
Overview of Blender’s Features
Blender’s key features can be summarized as follows:
- Modeling: With a wide range of tools, Blender empowers users to create, manipulate, and sculpt 3D models effortlessly.
- Animation: Utilizing its timeline-based animation system, objects, characters, and cameras can be animated seamlessly within Blender.
- Texturing and Shading: Users have access to a variety of material and texture options in Blender to add realistic surfaces to their models.
- Rendering: Blender’s rendering engine is known for producing high-quality images and animations, supporting various rendering methods.
- Simulation: Using Blender, users can simulate numerous physical phenomena such as fluids, particles, cloth, and rigid body dynamics.
- Compositing: Through Blender’s node-based compositing system, users can merge and manipulate rendered images and videos.
- Scripting and Customization: Automation of tasks and extension of Blender’s functionality can be achieved through its powerful Python API.
This provides an overview of Blender’s features.
Understanding 3D Printing
Photo Credits: Futureproof3D.Com by Christopher Baker
Understanding 3D Printing is essential before attempting to 3D print using Blender. Here are several key factors to take into account:
- Process: 3D Printing entails the creation of a physical object by layering materials based on a digital model.
- Materials: Specific materials like plastic filaments or resin are required for different printers. Familiarity with material properties is crucial for achieving desired outcomes.
- Design: Utilizing Blender, one can create or modify 3D models, ensuring they are suitable for Printing without unsupported overhangs or excessive details.
- Printer Settings: Adjustment of print settings, such as layer height, print speed, and infill density, is necessary to achieve the desired level of resolution and strength.
- Post-Processing: After Printing, supports must be removed, the surface fine-tuned, and, if necessary, the object can be painted or polished.
Can You 3D Print with Blender?
Photo Credits: Futureproof3D.Com by Jesse Martin
Discover the exciting world of 3D Printing with Blender! In this section, we’ll explore the possibilities and potential of using Blender for 3D Printing. From its impressive capabilities to its compatibility with various 3D printing software and file formats, we’ll dive into how Blender can empower you to bring your imagination to life. So buckle up and get ready to unleash your creativity with Blender’s 3D printing prowess!
Capabilities of Blender for 3D Printing
Blender has many features and functionalities that make it an incredibly powerful tool for 3D Printing. One of its notable capabilities is its ability to provide design flexibility. With Blender, users can effortlessly create intricate and complex designs, giving them full control over the shape, size, and details of their 3D models.
Furthermore, Blender boasts a robust mesh editing capability. Users can easily manipulate the vertices, edges, and faces of their 3D models, allowing them to refine and modify their designs. This feature is particularly useful for optimizing models specifically for 3D Printing and resolving potential issues that may arise during the printing process.
In addition to design flexibility and mesh editing, Blender offers tools for adding support structures to 3D models. These structures are vital for printing overhangs and intricate details accurately. By utilizing Blender’s support structure tools, users can ensure successful Printing while reducing the risk of any print failures.
Blender also excels in its export capabilities. It supports many file formats commonly used in 3D Printing, such as STL and OBJ. This enables users to seamlessly export their models and prepare them for Printing using other software or directly with a 3D printer.
Furthermore, Blender integrates seamlessly with various 3D printing tools, providing dedicated tools and add-ons to enhance the 3D printing workflow. These tools automate numerous tasks, including checking the model’s printability, setting print parameters appropriately, and generating support structures as needed.
Overall, the capabilities of Blender for 3D Printing are truly commendable. Whether it’s the design flexibility, mesh editing, support structures, export capabilities, or integration with 3D printing tools, Blender is an invaluable asset in 3D Printing.
Compatibility with 3D Printing Software and File Formats
When using Blender for 3D Printing, it’s crucial to consider its compatibility with various software and file formats.
- Software compatibility: Blender offers seamless integration with well-known 3D printing software like Ultimaker Cura, PrusaSlicer, and Simplify3D. This ensures that the designing and printing processes can be easily connected.
- File format compatibility: Blender supports commonly used file formats for 3D Printing, such as STL (Stereolithography), OBJ (Object), and PLY (Polygon File Format). This guarantees that your models can be exported successfully and used with various 3D printers.
- Plugin availability: Blender provides specifically designed plugins and add-ons for 3D Printing, including Mesh Tools, 3D-Print Toolbox, and 3D-Toolset. These tools enhance compatibility and streamline the preparation process for Printing.
</>
How to Prepare a 3D Model for 3D Printing in Blender
Photo Credits: Futureproof3D.Com by Harold Robinson
Are we looking to dive into the world of 3D Printing with Blender? In this section, we’ll learn the ins and outs of preparing a 3D model for Printing. From importing and modifying models to strategically positioning and scaling them, we’ll cover all the necessary steps. We’ll also explore the crucial aspect of adding support structures for a successful print. Get ready to unlock the potential of Blender and unleash your creativity in the realm of 3D Printing. Let’s get started!
Importing and Modifying 3D Models
To start working with 3D models in Blender, follow these steps:
- Open Blender and go to the “File” menu.
- Select “Import” to choose the file format of your 3D model.
- Once imported, you can modify the model using various tools such as scaling, rotating, and translating.
- To make more advanced modifications, use Blender’s modeling tools like extrusion, beveling, and boolean operations.
- You can also add textures, materials, and colors to your model using the “Shading” workspace in Blender.
Remember, when importing and modifying 3D models in Blender, always save your work regularly to avoid losing progress. Consider exploring Blender’s extensive community resources and tutorials for further guidance. Happy modeling!
Positioning and Scaling of the Model
To properly position and scale a 3D model in Blender for 3D Printing, it is important to understand the dimensions and proportions of the desired object. Here is a table outlining the key steps:
| Step 1: | Import the 3D model into Blender. |
| Step 2: | Adjust the model’s position using the translation tools (grab, rotate, and scale). |
| Step 3: | Ensure the model’s dimensions are suitable for 3D Printing by measuring its size in Blender or using reference measurements. |
| Step 4: | Scale the model if necessary, considering the limitations of your 3D Printer and the desired size of the final printed object. |
Fun Fact: Properly positioning and scaling the model is crucial for minimizing printing issues such as warping, layer shifting, or inadequate details in the printed object.
Adding Support Structures
- To incorporate support structures in a 3D model in Blender for 3D Printing, follow these steps:
- Begin by selecting the model or part that requires support.
- Enter “Edit Mode” and choose “Face Select” mode.
- Select the faces that necessitate support.
- Next, navigate to the “Mesh” menu and choose “Faces” followed by “Extrude Faces Along Normals”.
- Adjust the extrusion distance to achieve the desired support height.
- Ensure that the support structures make contact with the model and remain stable.
- If necessary, add extra support structures to areas that may require more stability.
- Export the model with the support structures included in the file.
- Finally, proceed to 3D print the model, ensuring the support structures are included.
Optimizing the 3D Model for 3D Printing

Photo Credits: Futureproof3D.Com by Albert Lee
When it comes to 3D Printing with Blender, optimizing the 3D model for a flawless print is paramount. In this section, we will tackle the art of fine-tuning your model to overcome any mesh issues that may arise. We’ll also explore the intricacies of adjusting print settings and parameters to achieve the desired outcome. We’ll dive into the various 3D printing tools and add-ons offered by Blender, unlocking the full potential of this versatile software for your printing endeavors. Get ready to bring your designs to life with precision and perfection!
Identifying and Resolving Mesh Issues
When working with 3D Printing in Blender, it is crucial to identify and resolve mesh issues effectively to ensure a successful print. Here are some steps to assist you in this process:
- Check for non-manifold geometry, as it can lead to printing errors and anomalies, thereby affecting the print quality.
- Look for overlapping or intersecting faces and edges and rectify them to prevent any printing artifacts from occurring.
- Inspect for inverted normals, as they can significantly impact the appearance and overall quality of the printed object.
- Examine the overall geometry for any holes or gaps that may require filling before initiating the printing process.
- Apply appropriate smoothing and subdivision modifiers to ensure a seamlessly smooth and precise 3D model.
Similarly, an individual passionate about 3D Printing encountered issues with a complex mesh in Blender. However, by diligently following these steps, they successfully identified and resolved the mesh issues, resulting in a flawless and successful 3D print.
Adjusting Print Settings and Parameters
- To achieve successful 3D printing with Blender, it is crucial to adjust the print settings and parameters naturally. Follow these steps:
- Start by opening your 3D model in Blender and navigating to the “Properties” panel.
- In the “Object Data” tab, click on it and precisely adjust the scale of your model to match the desired printing size.
- Next, go to the “Modifiers” tab and carefully examine if any modifiers, such as “Subdivision Surface” or “Mirror,” require adjustment for optimal Printing.
- Under the “Scene” tab, customize the print settings according to your Printer’s requirements. This includes layer height, print speed, and infill density.
- Ensure that you review and modify the support settings if necessary. Consider the support type, angle, and density to guarantee a reliable support structure for overhangs and complex geometries.
- After making all the necessary adjustments, save the modified settings as a preset for future use.
By effectively adjusting these print settings and parameters in Blender, you can enhance the optimization of your 3D model for a precise and successful print.
Using Blender’s 3D Printing Tools and Add-ons
Blender’s 3D Printing Tools and Add-ons, a versatile 3D modeling software, offers various tools and add-ons to enhance the 3D printing process. Here are a few steps to utilize Blender’s 3D printing tools:
- Ensure the 3D print toolbox is enabled in the preferences menu.
- Utilize the 3D printing toolbox to check for printability issues and resolve them.
- Use the 3D Print Toolbox add-on to analyze and optimize the model’s mesh for better printing results.
- Employ the 3D Printing Toolset add-on to adjust print settings, such as wall thickness, infill, and support structures.
- Consider using additional add-ons, such as the 3D Print Operator and Mesh Tools, to enhance the 3D printing workflow further further.
Exporting the 3D Model for 3D Printing
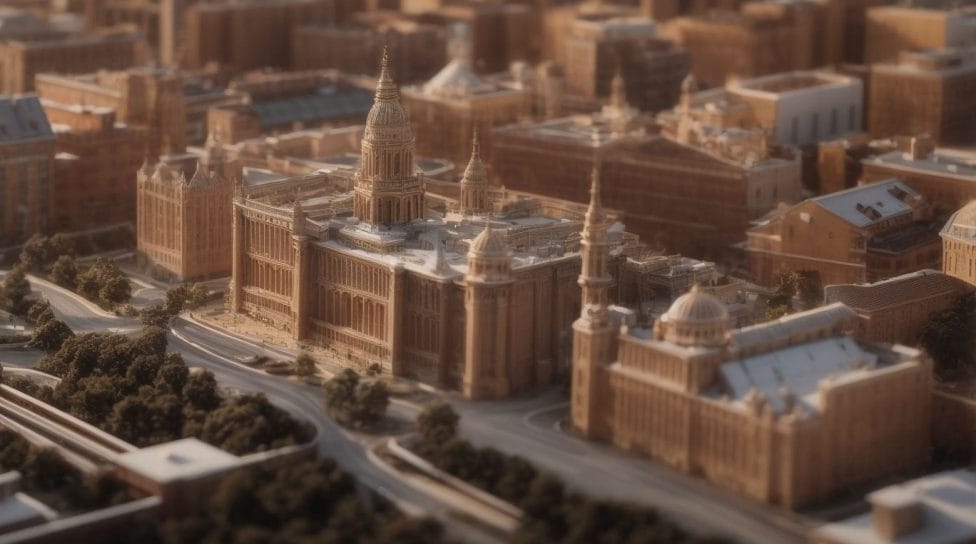
Photo Credits: Futureproof3D.Com by Paul Sanchez
When it comes to 3D Printing with Blender, a crucial step is exporting the 3D model for flawless Printing. In this section, we’ll uncover the secrets of generating the appropriate file format and explore the essential export settings and considerations. Get ready to dive into 3D Printing with Blender as we discover the key factors to ensure successful and high-quality prints. So, let’s embark on this journey of 3D modeling and printing excellence!
Generating the Appropriate File Format
Generating the appropriate file format is a crucial step in preparing a 3D model for Printing with Blender. Regarding file formats for exporting, Blender supports several options, such as STL, OBJ, and FBX. While making the decision, it is important to take into consideration the requirements of your 3D Printer as well as the software it employs. It is imperative to ensure that the chosen file format is compatible and able to represent the geometry and details of your model accurately. It is also essential to explore the specific settings and options available for each file format to optimize the model for Printing. By selecting the right file format, you can guarantee a seamless and successful 3D printing experience with Blender.
Regarding recommended file formats for 3D Printing in Blender, STL is highly endorsed due to its widespread support and suitability for most printers. Another advisable option is OBJ, which preserves crucial texture and color information. Best of luck with your 3D printing endeavors!
Export Settings and Considerations
“`
To ensure a smooth 3D printing process with Blender, it is crucial to understand the export settings and considerations. Here is a breakdown of the key factors to keep in mind:
| Export Settings and Considerations | Choose the appropriate file format, such as STL or OBJ, based on compatibility with your 3D printer software. |
| Export Settings and Considerations | Select the desired level of detail in the exported file, balancing file size and print quality. |
| Export Settings and Considerations | Ensure the exported model is scaled correctly, using appropriate units (e.g., millimeters or inches). |
| Export Settings and Considerations | Check for any non-manifold geometry or overlapping faces that may cause printing issues and resolve them before exporting. |
| Export Settings and Considerations | Decide whether support structures should be included in the exported file, depending on the complexity of the model and the requirements of the Printer. |
By paying attention to these export settings and considerations, you can optimize the compatibility and printability of your 3D models. Happy Printing!
Preparing the 3D Printer and Printing the Model

Photo Credits: Futureproof3D.Com by Henry Hall
Preparing your 3D Printer and bringing your digital model to life is an exciting journey. In this section, we’ll dive into the necessary steps to ensure a successful print. From calibrating the Printer for optimal performance to transferring the model seamlessly, and finally, the thrilling moment of Printing and post-processing, we’ll guide you through the essential aspects of this process. So, let’s get started and unlock the potential of 3D Printing with Blender!
Calibrating the Printer
- To ensure optimal 3D printing results with Blender, calibrating the Printer is crucial. Here are some steps to follow:
- Level the build plate: Use a leveling tool or adjust the Printer’s settings for proper bed leveling.
- Set the nozzle height: Adjust the height to ensure the proper distance from the build plate.
- Check belt tension: Ensure the belts are tight and properly tensioned to minimize wobbling or imprecise movements during Printing.
- Calibrate extruder steps/mm: Measure the amount of extruded filament and adjust the extruder steps/mm accordingly.
- Test print and fine-tune settings: Print a calibration test object and adjust print speed, temperature, and other settings for optimal results.
Remember, printer calibration is an iterative process. Experiment and make incremental adjustments until you achieve the desired print quality. Happy Printing!
Transferring the Model to the Printer
- Transferring the model from Blender to the 3D Printer is a crucial step in the 3D printing process. Here is a step-by-step guide to help you with Transferring the Model to the Printer:
- Save the 3D model file in a compatible format recognized by your 3D printer software to ensure smooth transfer.
- Open the 3D printer software and import the model file to initiate the transfer process.
- Check the positioning and scaling of the model to ensure it fits within the printing area of the 3D Printer.
- Adjust any necessary print settings and parameters, such as layer height, infill density, and print speed, per your requirements.
- If required, add supports to the model if it has overhangs or intricate features that need additional support during Printing.
True story: An architect friend used Blender to design a complex 3D model of a building for a competition. After following these steps for Transferring the Model to the Printer, he successfully moved the model to the 3D Printer. He created a stunning physical representation of his design. It impressed the judges and helped him win the competition.
Printing and Post-Processing
Regarding 3D printing with Blender, the printing and post-processing processes are important steps to ensure a successful outcome.
| Printing | Post-Processing |
| 1. Calibrating the Printer to ensure accurate Printing. | 1. Removing support structures carefully without damaging the print. |
| 2. Transfer the model file to the printer for printing. | 2. Sand or smooth the surface to eliminate any imperfections. |
| 3. Initiating the printing process and monitoring it for any issues. | 3. Painting or adding finishes to enhance the appearance of the print. |
| 4. Assembling multiple printed parts if necessary. |
Troubleshooting Common Issues in 3D Printing with Blender

Photo Credits: Futureproof3D.Com by David Wilson
Are you having trouble with 3D Printing using Blender? Don’t worry; we’ve got you covered! In this section, we’ll dive into troubleshooting common issues that arise during the 3D printing process. From tackling frustrating print failures to fixing errors in your printed model, we’ll provide practical tips and solutions to help you overcome these obstacles. So, grab your Blender models, and let’s get to the bottom of these 3D printing challenges!
Dealing with Print Failures
When dealing with print failures in 3D Printing with Blender, there are several steps you can take to troubleshoot and resolve the issues:
- Check the printer settings: Ensure that the printer settings in Blender are correctly configured, including the nozzle size, layer height, and print speed.
- Inspect the model: Double-check the 3D model in Blender for errors or issues, such as non-manifold geometry or overlapping faces.
- Verify the filament: Make sure that the filament is loaded correctly and is not tangled or jammed in the Printer.
- Monitor the temperature: Check the Printer’s temperature settings to ensure they are within the appropriate range for the filament used.
- Calibrate the bed: Ensure the print bed is properly leveled and calibrated to prevent adhesion or warping issues.
By following these steps, you can effectively address and overcome print failures when dealing with print failures in 3D Printing with Blender.
Fixing Errors in the Printed Model
- When encountering errors in a printed 3D model using Blender, several steps can be taken to fix them:
- Identify the error: Examine the printed model to determine the specific issue, such as gaps, warping, or stringing.
- Assess the cause: Analyze the possible factors contributing to the error, such as incorrect slicer settings or insufficient support structures.
- Modify settings: Adjust the printer, slicer, or model settings as needed. This may involve changing the temperature, speed, or layer height.
- Refine the design: Adjust the model design using Blender to address structural weaknesses or optimize supports.
- Print test models: Create smaller test prints to evaluate the changes and identify any remaining errors.
- Iterate and repeat: Continue making adjustments and printing test models until the desired results are achieved.
By following these steps, errors in the printed model can be effectively diagnosed and resolved, leading to higher-quality 3D prints.
Some Facts About “Can You 3D Print With Blender?”:
- ✅ Blender has supported 3D printing modeling and file formats since 2002. (Source: Our Team)
- ✅ The 3D Printing Toolbox and real-time Mesh Analysis features in Blender 2.67 make it easier for beginners and professionals to create 3D prints. (Source: Our Team)
- ✅ The training offered by Blender covers all the necessary information for creating efficient and high-quality 3D prints. (Source: Our Team)
- ✅ Blender provides printable models for users to experiment with. (Source: Our Team)
- ✅ Blender offers export formats for 3D Printing, such as STL and OBJ files, and includes a “3D Printing ToolBox” for analyzing meshes and identifying potential printing failures. (Source: Our Team)
